We use cookies to make your experience better. To comply with the new e-Privacy directive, we need to ask for your consent to set the cookies. Learn more.
Navigating the world of nail enhancements involves more than just artistic flair; it demands a keen understanding of the products we use, especially something as fundamental yet potentially hazardous as nail glue. Whether you're a seasoned nail technician or a salon owner, knowing how to safely apply and manage nail glue can make a significant difference in both client satisfaction and safety. From the chemical composition of various types of nail glues to the essential pre-application safety measures, this comprehensive guide aims to equip you with the knowledge you need. We'll delve into best practices for application, tackle common issues you might encounter, and even guide you through the safe removal process.
Understanding Nail Glue
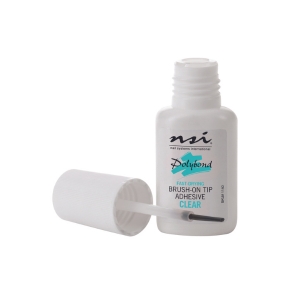
Pictiured above NSI Polybond Adhesive
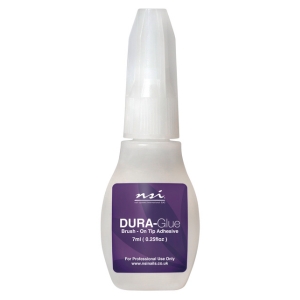
Pictured above NSI Dura Glue
In the beauty industry, especially within nail salons, understanding the products we use is crucial. Nail glue is one such product that is often overlooked but is essential for various nail applications. Let's delve into what nail glue is, its chemical makeup, and why it's so important to use it safely.
What is Nail Glue?
Nail glue is a special adhesive designed specifically for attaching artificial nails or nail extensions to natural nails. It's not just any glue; it's formulated to bond quickly and securely, ensuring that your nail enhancements stay in place for an extended period. Whether you're applying acrylic nails, gel tips, or even nail art decorations, nail glue is the go-to product for a secure and lasting application.
Chemical Composition of Nail Glue
The primary ingredient in most nail glues is cyanoacrylate, a fast-acting adhesive that bonds almost instantly upon contact with surfaces. While it's highly effective, it's also important to note that cyanoacrylate can be irritating to the skin and eyes. Some formulations may also include additional components like accelerators or stabilisers to improve performance and shelf life. It's crucial to read the ingredient list and safety data sheets, especially if you're in a professional setting like a nail salon. Knowing what's in the products you're using can help you take appropriate safety measures.
Risks Associated with Nail Glue
While nail glue is incredibly useful, it's not without its risks. The most common issue is skin irritation or allergic reactions, particularly if the glue comes into contact with the skin for an extended period. In more severe cases, misuse of nail glue can lead to respiratory issues if the fumes are inhaled in large quantities. There's also the risk of bonding skin together or to other objects, which can be a painful experience requiring medical intervention.
For these reasons, it's essential to handle nail glue with care. Always read the instructions and safety warnings on the packaging, and ensure you're working in a well-ventilated area. Gloves and eye protection are also recommended, especially for professionals who use these products regularly.
Understanding Different Types of Nail Glue
In the nail salon business, we often find ourselves reaching for nail glue without giving much thought to the type we're using. However, not all nail glues are created equal. There are various types available in the market, each with its own set of characteristics and ideal uses. Let's explore these types to help you make an informed choice for your salon or beauty business.
Traditional Nail Glue
When we talk about traditional nail glue, we're referring to the classic, fast-acting adhesive that comes in small tubes. This type of glue is perfect for quick applications and emergency fixes. It bonds almost instantly, making it ideal for attaching artificial nails or repairing a broken natural nail. However, it's worth noting that traditional nail glue can be quite strong and may cause irritation if it comes into contact with the skin. Always handle it with care and follow safety guidelines to avoid any issues.
Brush-On Nail Glue
Brush-on nail glue offers a bit more control during application, thanks to its brush applicator. This type of glue is excellent for more intricate work, such as applying nail art or jewels. The brush allows for a more even distribution of the glue, reducing the risk of lumps or air bubbles. It's also generally less messy than traditional nail glue, making it a favourite among professionals who require precision. However, brush-on glue may take slightly longer to set, so it's essential to allow adequate time for the adhesive to bond. NSI do two brush on glue's which are called Polybond Adhesive and Dura Glue, both are very popular products.
Gel-Based Nail Glue
Gel-based nail glue is the new kid on the block, and it's quickly gaining popularity for several good reasons. Unlike traditional or brush-on types, gel-based nail glue has a thicker consistency, which makes it easier to control during application. This type of glue is particularly beneficial for attaching larger nail enhancements, like full nail tips or even 3D nail art. The gel consistency also tends to be less irritating to the skin, making it a safer option for those with sensitive skin or allergies.
Gel-based nail glue often comes in a tube with a fine-tip applicator, allowing for precise application. It's a versatile option that's well-suited for both quick fixes and more elaborate nail designs.
Choosing the Right Glue for Your Nail Needs
In our line of work, we know that the right tools can make all the difference. This is especially true when it comes to selecting the appropriate nail glue for specific applications. Whether you're a salon owner, a nail technician, or someone deeply involved in the beauty industry, choosing the right glue can be a game-changer. Here's how to make that choice easier.
Assessing Your Nail Type
Before you even think about which glue to use, it's crucial to understand your client's nail type. Are their nails brittle or strong? Oily or dry? The answers to these questions can significantly impact which type of glue will work best. For instance, if you're dealing with brittle nails, you may want to opt for a gentler, gel-based glue. On the other hand, stronger nails might require a more robust, traditional adhesive for a secure bond. Knowing your client's nail type can help you tailor your approach and achieve the best results.
Matching Glue to Nail Art
If you're planning to dazzle your clients with intricate nail art or designs, the type of glue you choose becomes even more critical. For detailed work, a brush-on glue is often the best choice due to its precision applicator. It allows you to place tiny jewels, beads, or other decorations with ease. However, if you're going for larger pieces of art or full nail tips, a gel-based glue might be more appropriate due to its thicker consistency and stronger bond.
Considering Longevity and Strength
When your clients are looking for a long-lasting application, the strength and longevity of the glue are paramount. Traditional nail glue is often the go-to for its quick-drying and strong bonding capabilities. However, if you're looking for something that offers a bit more flexibility without sacrificing strength, gel-based glues are an excellent option. They provide a durable bond but are less likely to crack or break, making them ideal for clients who are hard on their hands or involved in manual work.
Safety Tips and Proper Application Techniques
When it comes to applying nail glue, a few simple precautions can go a long way in preventing accidents and ensuring a smooth application process. Let's go through some essential safety tips and techniques that every professional in the nail salon and beauty industry should know.
Pre-Application Safety Measures
Before you even unscrew the cap off the nail glue bottle, there are a few things you should do. First, make sure you're working in a well-ventilated area to avoid inhaling any fumes. Next, gather all the tools you'll need for the application so you won't have to scramble for them later, potentially causing spills or accidents. It's also a good idea to put on a pair of gloves to protect your skin from any accidental contact with the glue. Lastly, always read the instructions and safety warnings on the glue packaging. Different brands may have specific guidelines that you should be aware of.
During Application Precautions
Once you're ready to apply the nail glue, take your time and be deliberate in your actions. If you're using traditional or gel-based glue, apply it sparingly to avoid overflow that could come into contact with your skin. For brush-on types, use the applicator to evenly distribute the glue without creating lumps or air bubbles. Always keep the glue bottle upright when not in use to prevent spills. If you're working with a client, make sure their hand is stable to avoid any sudden movements that could lead to accidents.
Post-Application Care
After successfully applying the nail glue and completing the nail enhancement, it's crucial to take some post-application steps. First, securely close the glue bottle and store it in a cool, dry place. Then, remove your gloves and wash your hands thoroughly. If you're a professional, it's also a good practice to inform your client about any aftercare they should follow. This could include avoiding water for a certain period or being cautious when using their newly enhanced nails for the first few days.
Precautions Before Using Nail Glue
Safety should always be our top priority, especially when dealing with products like nail glue that can be potentially hazardous if misused. Before you or your clients jump into the application process, there are several precautions to take. These steps not only ensure a smooth application but also significantly minimize risks.
Skin and Nail Preparation
Before you even think about applying nail glue, it's essential to prepare the skin and nails adequately. Here's a simple guide to get you started:
- Clean the Nails: Start by cleaning the nails thoroughly. Use a gentle nail polish remover to get rid of any old polish or residue.
- Sanitize the Hands: After cleaning, sanitize both your hands and your client's hands with an alcohol-based sanitizer.
- Buff the Nails: Lightly buff the surface of the nails to create a slightly rough texture. This helps the glue adhere better.
- Apply a Base Coat: If you're working with sensitive or brittle nails, consider applying a protective base coat to act as a barrier between the nail and the glue.
By following these steps, you're creating a clean and safe environment for the nail glue to adhere, reducing the chances of infection or irritation.
Allergy Testing
One often-overlooked precaution is allergy testing. While it may seem like an extra step, it's crucial for ensuring the safety of your clients. Here's how to go about it:
Patch Test: Apply a small amount of the nail glue on a discreet area of the skin, like the inside of the wrist.
Wait and Observe: Leave the glue on for about 20-30 minutes and then remove it. Observe the area for any signs of redness, itching, or irritation over the next 24 hours.
Proceed with Caution: If no adverse reactions occur, you can proceed with the full application. However, if there is any sign of irritation, it's best to choose a different type of glue or consult a healthcare professional for advice.
Taking the time to conduct an allergy test can save you and your client from potential discomfort or health risks down the line.
Safe Application of Nail Glue
Once you've taken all the necessary precautions, it's time to get down to the actual application of the nail glue. But even at this stage, safety should remain a priority. Let's explore how to apply nail glue in a manner that minimizes risks while ensuring a strong and lasting bond.
Amount of Glue to Use
Believe it or not, the amount of glue you use can significantly impact not only the end result but also the safety of the application. Here are some general guidelines:
- Natural Nails: For natural nails, a small drop of glue is usually sufficient. Too much can cause the glue to spread and come into contact with the skin.
- Artificial Nails: When applying artificial nails or extensions, a slightly larger amount may be needed to ensure a secure bond. However, avoid using excessive glue as it can seep out and stick to the skin.
- Nail Art: For intricate nail art or decorations, a minimal amount is best. You can use a toothpick or a fine-tip applicator to place tiny dots of glue where needed.
Remember, less is often more when it comes to nail glue. Using the right amount can help you avoid unnecessary complications.
Application Techniques
The technique you use to apply the glue can also make a big difference in both the outcome and safety. Here are some best practices:
- Hold Steady: Make sure both your hand and your client's hand are stable. Use a flat surface to rest the hands and avoid any sudden movements.
- Apply Evenly: Whether you're using a brush or a standard applicator, aim for an even layer of glue. Uneven application can lead to weak spots or bubbles.
- Press and Hold: After applying the glue, press the artificial nail or decoration firmly against the natural nail. Hold for a few seconds to allow the glue to set.
- Wipe Excess: If any glue seeps out from the sides, quickly wipe it away with a tissue or cotton swab before it dries.
- Cap It Off: Always replace the cap on the glue bottle immediately after use to prevent spills or drying out.
Post-Application Care and Removal
After successfully applying nail glue and achieving the desired look, the job isn't over just yet. Post-application care is crucial for maintaining the health of your nails and ensuring the longevity of the application. Additionally, when it's time to remove the nail enhancements, doing so safely is of utmost importance. Let's delve into these aspects.
Monitoring for Issues
Once the nail glue has been applied and your nails are looking fabulous, it's essential to keep an eye out for any potential issues. Here's what to monitor:
- Irritation or Redness: If you notice any irritation or redness around the nail area, it could be a sign of a mild allergic reaction or improper application.
- Loose Enhancements: Keep an eye out for any loose artificial nails or decorations. If they start to lift, it's best to address the issue immediately to prevent further damage.
- Discoloration: Any change in the color of your natural nails or the enhancements should be noted, as it could indicate an underlying issue.
By staying vigilant, you can catch and address any issues before they become significant problems.
Safe Removal Techniques
When it comes time to remove the nail glue, safety should be your top priority. Here are some steps to follow:
- Soak in Acetone: The safest way to remove nail glue is to soak your nails in acetone. Place a cotton ball soaked in acetone over the nail and wrap it in foil. Leave it on for about 10-15 minutes.
- Gently Pry: After soaking, use a wooden cuticle stick to gently pry the artificial nail or decoration away from the natural nail.
- Avoid Force: Never use force or pull on the enhancements, as this can damage the natural nail underneath.
- Wash Thoroughly: After successful removal, wash your hands thoroughly to remove any remaining acetone or glue residue.
Post-Removal Care
After you've safely removed the nail glue, it's important to give your nails some TLC. Here are some tips:
- Moisturize: Apply a nourishing cuticle oil or hand cream to replenish moisture lost during the removal process.
- Buff Lightly: Use a buffer to smooth out any rough edges or surfaces on the natural nail.
- Rest: Give your nails a break from any enhancements or harsh chemicals for at least a few days to allow them to recover.
Conclusion
In the fast-paced, ever-evolving world of nail salons and beauty businesses, staying ahead means mastering the nuances of the products we use daily. Nail glue, often seen as a simple adhesive, holds far more significance when you consider the safety and satisfaction of your clients. We've journeyed through the types of nail glues available, the critical safety precautions to take before, during, and after application, and even touched upon post-application care and removal techniques. Armed with this knowledge, you're not just enhancing nails; you're elevating the standard of care and safety in your professional practice. Here's to achieving flawless, long-lasting, and above all, safe nail enhancements.
Frequently Asked Questions
Q1: How Long Should I Wait Before Painting Over Nail Glue?
It's best to wait until the nail glue has completely dried before applying any polish or treatments. Typically, this takes about 2-3 minutes, depending on the type of glue used. Rushing this process can lead to a less durable bond and may affect the quality of your nail art.
Q2: What Should I Do If Nail Glue Gets Into My Eyes?
If nail glue comes into contact with your eyes, seek medical attention immediately. Do not try to rinse your eyes with water, as this can cause the glue to set. A healthcare professional will provide the appropriate treatment to minimize damage and discomfort.
Q3: Can Expired Nail Glue Still Be Used?
Using expired nail glue is not recommended. Over time, the chemical composition of the glue can change, reducing its effectiveness and potentially increasing the risk of skin irritation or allergic reactions. Always check the expiration date before use and dispose of any outdated products.