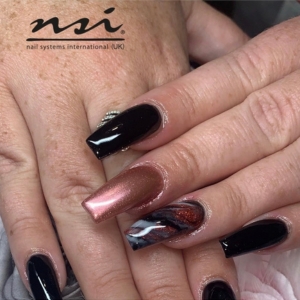
What Are Holographic Nails, and How to Achieve Them?
- By Nicola Overment
- 9 Oct 2023
In the vibrant world of nail art, holographic nails are making a shimmering statement. Imagine your fingertips adorned with a rainbow effect, where colours dance and shift with every movement—an art form that turns nails into a mesmerising spectacle. But what exactly are holographic nails, and how do they achieve that entrancing, otherworldly look? In this article, we'll unravel the science behind the holographic trend, from the unique pigments like Spectraflair that create this visual magic, to the various methods you can employ to achieve this look at home, be it with polish, foils, or press-on options. We'll also guide you through expert tips for flawless application, and explore the future trends of this captivating style.

What Makes Holographic Nails Unique?
Holographic nails hold a special place, offering a mesmerising effect that is both futuristic and enchanting. But what is it that sets these nails apart from the rest? The secret lies in their composition and the types of holographic pigments used, which interact with light in a way that traditional nail polishes simply cannot replicate. Let's delve deeper into the science and artistry behind these captivating nails.
Composition of Holographic Nails
At the core of the holographic nail's mesmerising effect are special pigments, the most notable of which is Spectraflair. Spectraflair is a pigment made from microscopic aluminium flakes that are partially coated with magnesium fluoride. These tiny flakes are the magic ingredient that gives holographic polish its unique properties. When light hits these pigments, it is refracted and diffracted, breaking the light into a spectrum of colours that creates the iconic rainbow effect we associate with holographic nails.
Unlike traditional glitter flakes, which reflect light in a sparkling but static way, the pigments in holographic polish interact with light dynamically. They refract light, bending and scattering it in multiple directions, which is what creates the vibrant, shifting rainbow effect that is so characteristic of holographic nails. This complex interaction between light and pigment is what sets holographic nails apart, making them a standout choice for those looking to make a statement with their nail composition.
Types of Holographic Polishes
When it comes to achieving the holographic look, there are two primary types of polishes that artists and enthusiasts can choose from: scattered polishes and linear holographic pigments.
Scattered Polishes:
These polishes contain holographic pigments that are dispersed in a way that creates a scattered, more random rainbow effect across the nails. The result is a softer, more diffused look that still captures the eye with its shifting colours. Scattered polishes are perfect for those who want a subtler, yet still captivating, holographic effect.
Linear Holographic Pigments:
In contrast, linear holographic pigments are arranged in a more orderly fashion, creating a strong, direct line of rainbow light that moves cohesively across the nail. This produces a more intense and defined holographic effect, making the nails look almost like a prism, breaking the light into a perfect spectrum. For those seeking a bold and striking look, linear holographic pigments are the go-to choice.
Different nail polish brands offer a variety of these polishes, allowing for a wide range of creativity and design options. Whether you are a professional nail artist seeking to expand your polish selection or a DIY enthusiast eager to experiment with new styles, understanding the differences between these polish types is key to mastering the art of holographic nails.
Difference Between Chrome and Holographic Nails
In the ever-evolving world of nail art, two styles that often capture attention are chrome and holographic nails. While both offer a futuristic and eye-catching appearance, they are distinct in their application, finish, and overall effect. In this section, we will delve into the nuances of these two popular styles, providing insights into when you might choose one over the other.
Understanding Chrome Nails
Chrome nails, known for their sleek and shiny finish, are like having tiny mirrors at your fingertips. This style is achieved using a special chrome powder that is applied over gel polish, resulting in a smooth, metallic finish that is both bold and elegant. Unlike the shifting rainbow effect of holographic nails, chrome nails deliver a consistent, metal-like appearance that is reflective and polished.
The key to chrome nails lies in the chrome polish used. This polish contains fine metallic particles that adhere to the nail, creating a surface that is highly reflective. It’s this mirror-like quality that gives chrome nails their name and their distinctive, shiny appearance.
Comparing Chrome and Holographic Effects
Let’s break down the key differences and similarities between these two captivating nail art options:
Appearance:
- Chrome Nails: Known for their smooth, metallic, and reflective finish, chrome nails resemble a polished metal surface. They maintain a consistent, shiny appearance in all lighting conditions.
- Holographic Nails: These nails, on the other hand, display a vibrant spectrum of colours that shift and change as they catch the light, creating a dynamic and mesmerising effect.
Application:
- Chrome Nails: Application involves a base coat, colour coat, and a layer of chrome powder that is rubbed onto the nail. A top coat seals the design.
- Holographic Nails: These require a special holographic polish or powder, which contains pigments that create the iconic rainbow effect when applied.
Finish:
- Chrome Nails: Yield a mirror-like, metallic finish that is sleek and reflective.
- Holographic Nails: Produce a radiant, multi-dimensional look that constantly changes based on the lighting and angle.
When to Choose:
- Chrome Nails: Ideal for those seeking a sophisticated, polished look that mimics the appearance of metal. Perfect for a classy and modern style.
- Holographic Nails: Best for those who love a playful, vibrant look that stands out and captures attention with its shifting colours.
While both chrome and holographic nails offer a unique and modern twist on traditional nail art, they are distinct in their visual effects and application methods. Chrome nails are all about achieving that sleek, metallic shine, whereas holographic nails are celebrated for their radiant, colour-shifting charm. The choice between the two ultimately boils down to personal style preference and the statement one wishes to make with their nail design.
How to Achieve Holographic Nails at Home
Achieving holographic nails doesn’t require a trip to the salon. With the right tools and a bit of patience, you can create this stunning look right at home. Whether you prefer polish, foils, powders, or press-on options, we’ve got you covered. Here’s a comprehensive guide to achieving holographic nails at home, complete with step-by-step instructions and expert tips for each method.
Using Holographic Nail Polish
Transform your nails into a rainbow spectacle with holographic nail polish. Here’s how:
- Prep Your Nails: Start with clean, dry nails. Shape them as desired and push back your cuticles.
- Apply a Base Coat: This is essential for protecting your nails and ensuring the polish adheres well.
- Layer Your Polish: Apply the first layer of holographic nail polish thinly and evenly. Allow it to dry completely before adding a second layer to intensify the rainbow look.
- Seal with a Top Coat: Finish with a clear top coat to seal in the colour and add a glossy finish.
- Tips: For a more vibrant holographic effect, consider applying a black or dark-coloured base polish before the holographic polish.
Creating Holographic Nails with Nail Foils
For a dramatic and abstract design, holographic nail foils are a fantastic option. Here’s the process:
- Choose a Base Colour: Apply a polish that complements the foil, often a black or dark shade works well.
- Apply Nail Foil Adhesive: Once your base polish is dry, apply a thin layer of nail foil adhesive and wait until it becomes tacky.
- Press the Foil: Press the holographic foil onto your nail, shiny side up, and peel it back to reveal the foiled design.
- Seal with a Top Coat: Apply a clear top coat to protect and seal the design.
- Tips: Experiment with different base colours and foil patterns for unique looks.
Exploring Holographic Nail Powder
For intensely holographic nails, consider using a holographic nail powder with a gel manicure kit. Here’s how:
- Apply a Gel Base Coat: Start with a thin layer of gel base coat and cure it under an LED light as per the product’s instructions.
- Apply the Powder: Using an eyeshadow applicator or a silicone tool, gently rub the holographic powder onto the surface of the nails.
- Seal with a Gel Top Coat: Apply a gel top coat to seal in the powder and cure it under the LED light.
- Tips: Work in thin layers and ensure each layer is fully cured for the best results.
Press-On Holographic Nails
For a quick and stunning transformation without the need for nail art expertise, press-on holographic nails are a perfect choice. Here’s how:
- Select Your Press-Ons: Choose a set of holographic press-on nails in the patterns and colours you love.
- Apply the Press-Ons: Follow the instructions on the package to apply the press-on nails securely to your natural nails.
- Customize (if desired): Feel free to file or shape the press-on nails to your liking.
- Benefits: This method is perfect for beginners or those looking for an instant, other-worldly manicure without the mess or drying time.
With these methods at your fingertips, achieving holographic nails at home is easier than ever. Whether you’re a seasoned nail artist or a complete beginner, these techniques offer a range of options to suit your skills, patience level, and desired look.
Tips and Tricks for Perfect Holographic Nails
Achieving the perfect set of holographic nails can feel like a magical experience, but it’s not without its challenges. To help you navigate the process and emerge with a stunning result, we’ve compiled a list of expert tips and tricks. From color choices to curing methods, here’s your guide to avoiding common mistakes and mastering the art of holographic nails.
Tips for Beginners
If you’re new to the world of holographic nails, welcome! Here are some essential tips to get you started:
- Choose Quality Products: Invest in a high-quality holographic nail polish or powder. Look for products with good reviews from other nail fanatics.
- Use the Right Tools: An eyeshadow brush or a kabuki brush can be perfect for applying holographic powder evenly.
- Practice Patience: Holographic nail art can be a bit of a challenge at first. Take your time with each step, and don’t be discouraged by initial mistakes.
- Proper UV Curing: If you’re using gel products, ensure you have a reliable UV light for curing, and follow the recommended times closely.
- Avoid Over-application: Less is often more when it comes to holographic products. Avoid applying too thick a layer, as this can diminish the effect.
Color Choices and Combinations
The color you choose as a base for your holographic nails can dramatically impact the final look. Here are some tips for selecting the perfect hue:
- Consider Your Outfit: Think about the colors you tend to wear most often and choose a holographic color that will complement your wardrobe.
- Match the Occasion: Opt for subtle, neutral tones for formal events, and feel free to go bold and vibrant for casual or festive occasions.
- Experiment and Have Fun: Don’t be afraid to try unexpected color combinations. Sometimes the most stunning looks come from surprising pairings.
- Use a Dark Base for Intensity: Applying holographic polish over a black or dark-colored base can make the holographic colors pop even more.
Curing Methods and Accessories
To achieve the best possible holographic effect, the right curing methods and accessories are key. Here’s what you need to know:
- Invest in a Quality UV Light: For gel-based holographic nails, a good UV light is essential. Look for one with strong, even coverage to ensure your nails cure properly.
- Select the Right Brushes: For applying holographic powder, brushes matter. Opt for a soft, dense brush that can pick up and press the powder effectively.
- Accessorize Thoughtfully: Consider adding small rhinestones or decals to your holographic nails for an extra touch of glamour. Just be careful not to overshadow the holographic effect.
- Properly Prep Your Nails: Before you start with the holographic process, ensure your nails are clean, dry, and free of oils. This helps the products adhere better and last longer.
With these tips and tricks in your nail art toolkit, you’re well on your way to achieving a set of holographic nails that are as flawless as they are mesmerizing. Remember, practice makes perfect, so enjoy the creative journey!
Conclusion and Future Trends
As we’ve journeyed through the captivating world of holographic nails, one thing is clear: this nail art form is more than just a fleeting trend—it’s a vibrant expression of individuality and creativity. From the mesmerising rainbow effects of holographic polishes to the stunning designs achievable with foils and powders, holographic nails offer endless possibilities for those looking to make a statement with their hands.
Looking ahead, the future of holographic nails appears to be as bright and dynamic as the designs themselves. As the nail art industry continues to innovate, we can anticipate new products and techniques that will push the boundaries of what is possible. Imagine holographic designs that incorporate 3D elements, or polishes that change their holographic patterns in response to temperature or light. As fashion trends evolve, so too will the ways in which holographic nails are incorporated into overall looks, potentially influencing not just the nail art industry, but the broader fashion industry as well.
But beyond the trends and the industry evolution, at the heart of holographic nails is the opportunity for personal expression. They are a canvas for creativity, a way for individuals to express their personality and style in a unique and eye-catching manner. Whether you’re a seasoned nail artist or someone experimenting with nail art for the first time, holographic nails are a beautiful and fulfilling way to express yourself.
So, as we look to the future, we encourage you, our readers, to dive into the world of holographic nails with enthusiasm. Experiment with colors, play with designs, and don’t be afraid to push the boundaries of your nail creativity. In a world where fashion is constantly evolving, holographic nails stand as a testament to the joy of personal expression and the exciting future of nail art.
Frequently Asked Questions
How Long Do Holographic Nails Typically Last?
Holographic nails, when properly applied and sealed with a top coat, can last as long as a traditional gel or polish manicure—generally around two to three weeks. The longevity can vary based on your nail preparation, the products used, and your daily activities.
Are Holographic Nails Safe for Natural Nails?
Yes, holographic nails are safe for natural nails. The key is to ensure proper application and removal techniques. Avoid peeling off the polish or powder, as this can damage the nail bed. Instead, use a gentle nail polish remover or soak-off method.
Can Holographic Effects Be Combined with Other Nail Art Styles?
Absolutely! Holographic effects can be beautifully combined with other nail art styles, such as marbling, stamping, or hand-painted designs. The holographic element can serve as a vibrant base or a dazzling accent to your overall design.
How Can I Prevent Chipping or Peeling of My Holographic Nails?
To prevent chipping or peeling, ensure you start with clean, dry nails, use a quality base coat, and seal your design with a durable top coat. Avoid using your nails as tools to prevent physical damage. Regularly applying a top coat every few days can also help to maintain the manicure.
Are There Vegan and Cruelty-Free Options for Holographic Nails?
Yes, many brands offer vegan and cruelty-free holographic nail polishes and powders. Always check the product labels or the brand’s website for certifications and ingredient lists to confirm.